
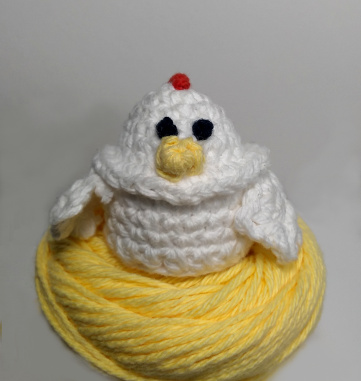
I decided to go a more traditional route with the Easter egg cozies this week. This charming chicken comes with a sweet surprise, a tiny yellow chick that will fit I side her egg. The egg then fits inside the chicken and you have a two-for-one handmade treasure for your favorite little one's Easter basket.
This pattern uses both hdc dec and a bullion knot. PDF instructions for both are linked at the bottom of the page, and are available on my Learn to Crochet page. Have fun!
Charming Chicken Easter Egg Cozy
Finished size:
Approx. 2” wide by 2 ½ “ tall
Materials:
Crochet hook, size F/3.75mm
Cotton yarn, 4 ply
1 oz. white and yellow
< 1 oz. black, red, orange
Embroidery Thread
Small amount of black
Scissors
Yarn or tapestry needle
Polyester fiberfill
Embroidery Needle
Regular size plastic Easter Egg
Chicken Cozy
Start at the top of the head with white yarn
Rnd 1: Sc 5 in magic ring OR Ch 2, Sc 5 in the second ch from the hook (5 sts)
Rnd 2: Inc in each of the 5 sts of the previous rnd (10 sts)
Rnd 3: [Inc in one st, Sc in the next st] rep 5 times around (15 sts)
Rnd 4: Sc 15 (15 sts)
Rnd 5: [Inc, Sc 2] rep 5 (20 sts)
Rnd 6: Sc 20 (20 sts)
Rnd 7: Working in the Back Loop Only [Inc, Sc 4] rep 4 times around (24 sts)
Rnd 8: Sc 24 (24 sts)
Rnd 9: [Dec, Sc 4] rep 4 (20 sts)
Rnd 10: Working in the Front Loops Only, 2 Hdc, 2 Dc, 2 Dc, 2 Hdc. This leaves 4 unworked back loops. I strongly recommend using a stitch marker to mark these, because we will be working into them in the next round. Then, working in both loops, Sc 16 to finish Rnd. 10.

Rnd 11: Working in the unworked back loops from the previous rnd, Hdc Dec, Hdc 2. Then, working in the remaining 16 Sc-sts of the previous rnd, Hdc 6, Hdc Dec, Hdc 6 (18 sts)
Finish off and weave in ends
Now we’re going to make the ruff around the chicken’s neck, working into the loops that remain from the Back Loop Only sts in Rnd 7. Hold the cozy upside down, with the open end toward the top. Find the first unworked loop and insert your hook into it, up from the bottom.
Yarn over and pull through. Yarn over and pull through again. Insert your hook back into the same loop. Yarn over and pull through, yarn over and pull through both loops on the hook. This counts as the first Sc of the round. Sc 2 in the next loop. Then [Sc, Sc 2] rep 14 times around the rest of the loops. (30 sts)
Slip st to finish off, weave in ends.
Beak
Use yellow yarn.
Rnd 1: Sc 4 in magic ring OR Ch 2, Sc 4 in the second ch from the hook. (4 sts)
Finish off; weave in ends.
Wings
Use white yarn. Make 2.
Rnd 1: Sc 7 in magic ring OR Ch 2, Sc 7 in the second ch from the hook. (7 sts)
Rnd 2: Sc in the first st. Ch 3. Sl st back in the original st to form one feather of the wing. Rep 3 more times to form 4 feathers all together. Leave the remaining 3 stitches of the previous rnd unworked.
Finish off; weave in ends.
Assembly:
Sew around the beak to attach it to the front center of the chicken’s face, just above the ruff. Use black yarn to make French knot eyes to finish the face. Complete the head by using red yarn to make a bullion knot as the chicken’s comb Next, sew the top of each wing to either side of the chicken below the ruff.


Chick
Start at the top of the head with yellow yarn
Rnd 1: Sc 6 in magic ring OR Ch 2, Sc 6 in the second ch from the hook (6 sts)
Rnd 2: [Inc, Sc 2] rep 2 (8 sts)
Rnd 3: Sc 8 (8 sts)
Rnd 4: Sc 4, [Inc, Sc] rep 2 (10 sts)
Rnd 5: Sc 4, [Inc, Sc 2] rep 2 (12 sts)
Rnd 6: [Inc, Sc 3] rep 3 (15 sts)
Rnd 7: [Dec, Sc] rep 5 (10 sts)
Stuff.
Rnd 8: Dec 5 (5 sts)
Finish off; weave in ends.
Assembly
Use orange yarn to work French knots to form both the chick’s feet and beak. Then use black embroidery floss to work French knots to form the eyes. Lastly, thread your tapestry needle with yellow yarn. Work several stitches on both sides of the chick to form the chick’s wings.
Find more free patterns at sheepofdelight.blogspot.com
Download this pattern as a PDF here.
Find instructions for the hdc dec here.
Find instructions for the bullion knot here.
Also, if you're interested in learning more useful embroidery stitches, Sarah's Hand Embroidery Tutorials is a great blog to check out.
Happy hooking!
Comments
Post a Comment